How to Set Up Ergonomic Reach Zones for a Multi‑Monitor Standing Desk: A Step‑by‑Step Guide
Introduction
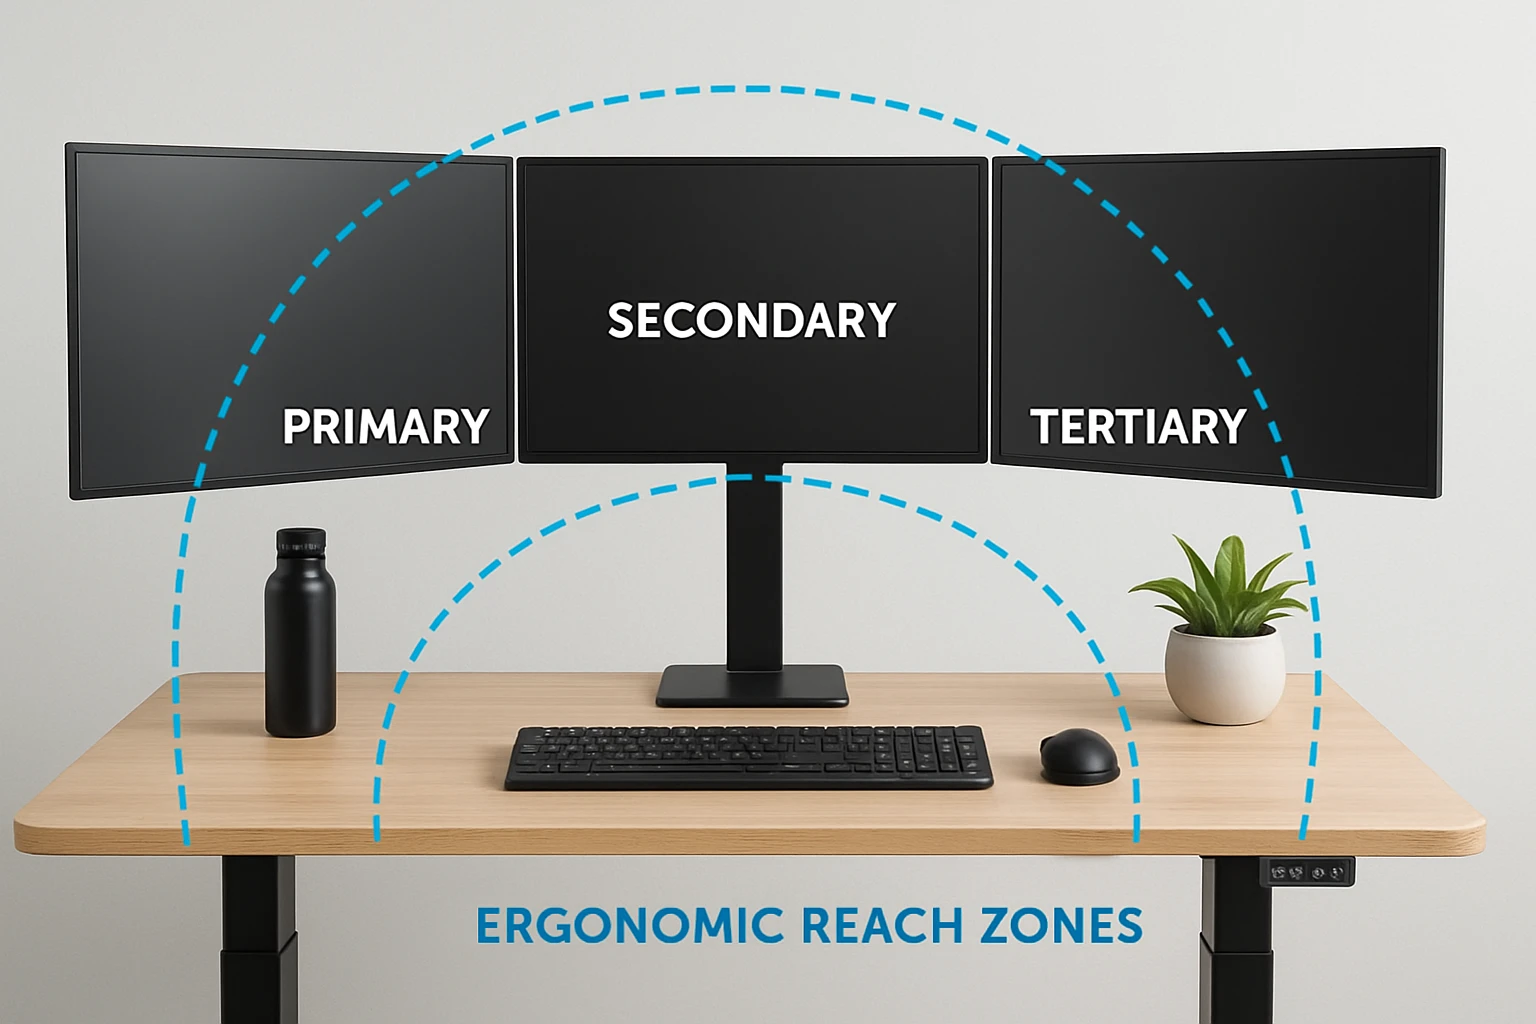
One of the most significant contributors to workplace comfort is the proper arrangement of reach zones around a workstation. When a user can access frequently used items without excessive stretching, fatigue diminishes and productivity rises. This guide explains how to configure a multi‑monitor standing desk so that the keyboard, mouse, and screens occupy optimal zones. By following each step, the reader will achieve a healthier posture while preserving flexibility for various tasks.
The instructions incorporate two specific tools that simplify the process: the VIVO Electric Dual Motor Standing Desk and the VIVO Dual Monitor Desk Stand. Both products have been selected for their reliability, ergonomic features, and strong user ratings. Even readers who already own alternative equipment can apply the same principles, as the guide focuses on universal ergonomic concepts.
What You’ll Need
- A sturdy standing desk such as the VIVO Electric Dual Motor Standing Desk.
- A dual‑monitor stand like the VIVO Dual Monitor Desk Stand.
- Two monitors (13‑27 inches) with VESA‑compatible mounting holes.
- Ergonomic accessories: keyboard tray, mouse, and cable management clips.
- A level, screwdriver, and a measuring tape.
Step 1: Assess Your Workspace and Define Reach Zones
Begin by measuring the available floor space and noting any obstructions such as doorways or lighting fixtures. The ideal reach zones follow the 10‑20‑30 rule: items within 10 inches of the body require the least effort, those between 10‑20 inches require moderate effort, and items beyond 20 inches should be used sparingly. Sketch a rough floor plan indicating where the desk will sit, ensuring that the desk’s footprint (63" x 32") fits comfortably.
Understanding these zones helps decide where the keyboard, mouse, and primary monitor belong. The keyboard and mouse should reside within the 10‑inch zone to minimize shoulder elevation. The primary monitor’s top should be at or slightly below eye level, while secondary monitors can occupy the peripheral zone without forcing the neck to rotate excessively.
Step 2: Assemble the VIVO Electric Dual Motor Standing Desk
Unpack the desk components and follow the included manual; the all‑steel frame provides a stable foundation for up to 220 lb of equipment. Use the supplied hex key to secure the legs to the frame, then attach the carbon‑fiber 63‑inch tabletop. The dual motors operate silently and support a height range of 24.3" to 50", allowing rapid transitions between sitting and standing.
Why this desk is recommended: its memory controller stores three preset heights, enabling the user to switch instantly between ergonomic positions. Priced at $349.99 with a 4.6‑star rating from 426 reviews, the desk balances cost and durability. Once assembled, place the desk in the location identified in Step 1, ensuring the surface is level before proceeding.
Step 3: Set the Desk Height for Optimal Keyboard and Mouse Placement
Adjust the desk to a height where the elbows form a 90‑degree angle when the hands rest on the keyboard. For most users, this height falls between 27" and 30" from the floor, but the exact measurement should be verified with a ruler. Use the push‑button controller to fine‑tune the height, then press one of the memory buttons to save the standing position.
Maintaining the keyboard within the 10‑inch reach zone reduces forearm strain. If the user prefers a separate keyboard tray, attach it below the tabletop, but ensure the tray does not interfere with the desk’s motor cables. The desk’s robust frame prevents wobble even when the height is set at its maximum 50".
Step 4: Install the VIVO Dual Monitor Desk Stand
Position the monitor stand on the desk surface, aligning its base with the centre of the workspace to distribute weight evenly. The stand’s heavy‑duty base measures 13" × 10.5" and includes padding to protect the tabletop. Attach the detachable VESA plates to each monitor, confirming that the mounting holes match either 75 mm × 75 mm or 100 mm × 100 mm patterns.
Why this stand is useful: it offers full articulation—including +90° to –90° tilt, 180° swivel, and 360° rotation—allowing precise alignment of each screen. With a 4.5‑star rating from 16,013 reviews, the stand has proven stability for monitors up to 27" and 22 lb each. Secure the VESA plates, tighten the clamps, and verify that the arms lock firmly before loading the monitors.
Step 5: Adjust Monitor Positions Within the Ergonomic Zones
Mount the primary monitor directly in front of the user, centering it on the desk’s midline. Adjust the height so that the top of the screen is at or just below eye level, typically 15‑20 inches from the eyes. Set the tilt to a slight backward angle (around 10°) to reduce glare and maintain a natural neck posture.
Place the secondary monitor to the side, angled inward at approximately 30° to minimize neck rotation. Ensure the secondary screen’s center remains within the 20‑30‑inch peripheral zone. Use the stand’s height‑adjustment column to align the secondary monitor’s top with the primary screen, creating a seamless visual field.
Step 6: Organize Cables and Peripheral Devices
Utilize the cable clips integrated into the monitor stand’s arms to route power and video cables neatly. Group cables with zip ties or Velcro straps, directing them toward the back of the desk to keep the work surface clear. Place the mouse within easy reach of the keyboard, ensuring it does not extend beyond the 10‑inch zone.
If additional accessories such as a webcam or speakers are required, mount them on the desk’s rear edge or on a small shelf that does not interfere with the reach zones. Proper cable management not only improves aesthetics but also prevents accidental tripping hazards when the desk is raised or lowered.
Step 7: Test the Setup and Fine‑Tune Adjustments
Spend several minutes performing typical tasks—typing, scrolling, and switching between monitors—to evaluate comfort. Observe any strain in the shoulders, neck, or wrists, and adjust desk height, monitor tilt, or arm angles accordingly. Remember that the standing desk’s memory presets allow rapid re‑testing without repeated manual adjustments.
Document the preferred settings by noting the memory button numbers associated with the optimal sitting and standing heights. This documentation facilitates consistent ergonomics for multiple users or future re‑configurations.
Tips & Pro Tips
- Alternate between sitting and standing every 30‑45 minutes to promote circulation and reduce fatigue.
- Use an anti‑fatigue mat when standing for extended periods; it cushions the feet and encourages subtle movement.
- Consider a wireless keyboard and mouse to reduce cable clutter and increase flexibility within the reach zones.
- Periodically reassess monitor distances; a change in posture or new equipment may shift optimal ergonomics.
Conclusion
By following the seven steps outlined above, one can establish ergonomic reach zones that enhance comfort, productivity, and health while using a multi‑monitor standing desk. The VIVO Electric Dual Motor Standing Desk and VIVO Dual Monitor Desk Stand provide reliable, adjustable foundations that simplify the setup process. Consistent evaluation and minor adjustments ensure the workstation remains aligned with the user’s evolving needs.
Implementing these practices will reduce musculoskeletal strain and create a workspace that supports both focused work and dynamic movement. One is encouraged to experiment with the memory presets and fine‑tune monitor angles until the ideal configuration is achieved.
Products Mentioned in This Guide
Frequently Asked Questions
What are ergonomic reach zones and why are they important for a standing desk?
Ergonomic reach zones are defined areas around a workstation where frequently used items can be accessed without stretching, reducing fatigue and improving posture.
How should the monitors be positioned within the reach zones on a multi‑monitor standing desk?
Place the top of each screen at eye level and about an arm’s length away, keeping the primary monitor directly in front and secondary monitors slightly angled.
What height should the keyboard and mouse be set at on a standing desk?
The keyboard and mouse should be at elbow height so the forearms are parallel to the floor, allowing wrists to stay neutral.
Which tools from VIVO are recommended for setting up ergonomic zones?
The VIVO Electric Dual Motor Standing Desk and the VIVO Dual Monitor Desk Stand are suggested for easy height and monitor adjustments.
Can the ergonomic reach zone principles be applied to desks other than VIVO models?
Yes, the same concepts of monitor distance, height, and keyboard placement work with any adjustable standing desk.