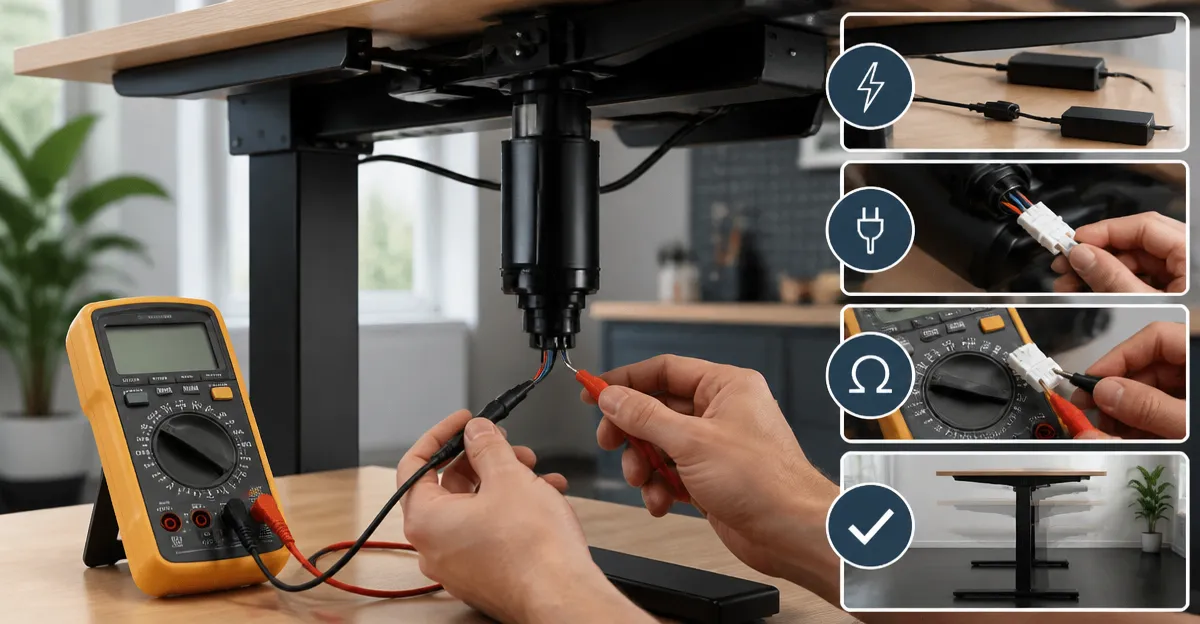
How to Test a Standing Desk Motor with a Multimeter: Step‑by‑Step Troubleshooting Guide
Introduction
Standing desks provide ergonomic benefits, but a faulty motor can quickly turn a healthy workspace into a source of frustration. This guide teaches the reader how to use a multimeter to evaluate motor continuity, voltage output, and control signal integrity. By following the procedures, one can identify whether the motor, power supply, or controller is at fault, saving time and money on unnecessary replacements.
The instructions are written for users with basic electrical knowledge and assume access to a standard digital multimeter. The guide also recommends three Amazon products that can serve as reliable tools or reference equipment during the troubleshooting process.
What You'll Need
- Digital multimeter capable of measuring voltage, resistance, and continuity.
- Phillips and flat‑head screwdrivers for panel removal.
- Safety gloves and goggles.
- HIENADTOR Charger Replacement – a 12V 24W power adapter compatible with most single‑motor standing desks.
- VIVO Desk Frame – a dual‑motor frame useful for comparing voltage and current characteristics.
- ErGear Desk Frame – a heavy‑duty frame with robust motor specifications for advanced testing.
Step 1: Ensure Safety and Power Isolation
Before opening any enclosure, disconnect the desk from the wall outlet. Unplug the power cord and press the emergency stop button if the model includes one. Wear insulated gloves and safety glasses to protect against accidental short circuits. Verify that the desk is truly de‑energized by setting the multimeter to AC voltage and probing the input terminals; the reading should be 0 V.
Using the HIENADTOR Charger Replacement later in the guide provides a known, safe voltage source for isolated testing, eliminating the risk of a faulty mains supply.
Step 2: Locate the Motor Wiring Harness
Remove the desk's bottom panel using a Phillips screwdriver. The motor harness is typically a short cable with a specific connector that plugs into the control board. Take a photo of the original wiring arrangement before disconnecting anything; this documentation aids reassembly.
If the desk uses a dual‑motor system, the harness will split into two identical connectors. The VIVO Desk Frame exemplifies a dual‑motor configuration, allowing the technician to compare pinouts and verify that each motor receives the correct signals.
Step 3: Test Power Supply Voltage
Connect the HIENADTOR Charger Replacement to an AC outlet. Set the multimeter to DC voltage (20 V range). Probe the positive (+) and negative (‑) terminals of the charger's output connector. A healthy charger should read approximately 12.0 V.
Record the voltage; if it deviates by more than ±0.3 V, the charger may be defective, and a replacement should be considered. The charger's UL certification (report E482416) ensures over‑current, temperature, and load protection, making it a safe test source.
Step 4: Verify Motor Continuity (Resistance Test)
Set the multimeter to the resistance (Ω) setting. Disconnect the motor harness from the control board to isolate the motor windings. Place one probe on the motor's positive terminal and the other on the negative terminal. A typical single‑motor standing desk coil shows a resistance between 2 Ω and 5 Ω.
If the multimeter reads infinite resistance (open circuit) or zero resistance (short circuit), the motor winding is damaged and must be replaced. The ErGear Desk Frame uses a dual‑motor system with similar resistance values; comparing readings can confirm whether the issue is specific to one motor or a systemic problem.
Step 5: Check Motor Voltage Under Load
Reconnect the motor harness, then power the desk using the HIENADTOR Charger Replacement. Activate the raise function on the control panel. While the motor is moving, set the multimeter to DC voltage and probe the motor terminals.
The voltage should remain close to the nominal 12 V. A significant drop (e.g., below 10 V) indicates insufficient current delivery, possibly due to a weak power adapter, damaged wiring, or a failing motor driver. The charger's 24 W rating (12 V × 2 A) is sufficient for most single‑motor desks, and its built‑in protections prevent overload during this test.
Step 6: Test Control Board Output Signals
Many standing desks use pulse‑width modulation (PWM) signals to control motor speed. Set the multimeter to frequency or duty‑cycle mode if available; otherwise, use a multimeter with a “diode” or “continuity” beep to verify that the control board is sending a signal when the raise/lower buttons are pressed.
Press the raise button and listen for a continuity beep; a lack of response suggests a faulty controller. The VIVO Desk Frame includes a memory controller with three preset heights, illustrating a typical control board design. Comparing the signal pattern with the VIVO frame can help pinpoint irregularities.
Step 7: Reassemble and Perform a Final Test
After all electrical checks, reconnect any disconnected cables, replace the bottom panel, and secure it with the original screws. Plug the desk back into the wall outlet (or use the charger replacement for a controlled test) and operate the raise and lower functions multiple times.
If the desk moves smoothly and reaches the desired heights, the motor and associated circuitry are functional. If intermittent movement persists, re‑examine the wiring harness for loose connections or consider replacing the motor or control board.
Tips & Pro Tips
- Always test voltage with the motor disconnected to avoid reading voltage drops caused by load.
- Label each wire with masking tape before removal to simplify reassembly.
- Use a multimeter with auto‑range capability to reduce manual setting errors.
- When testing dual‑motor desks, repeat the resistance and voltage tests on both motors; asymmetrical readings often indicate a single‑motor failure.
- Keep the HIENADTOR Charger Replacement on hand for future maintenance, as its snap‑in plugs provide a durable and safe connection.
Troubleshooting Common Issues
| Symptom | Possible Cause | Solution |
|---|---|---|
| Desk does not raise | Power adapter output low | Measure charger voltage; replace if below 11.5 V. |
| Motor makes humming sound but does not move | Motor winding shorted | Check resistance; replace motor if resistance <1 Ω. |
| Desk stops at mid‑height | Control board signal intermittent | Verify PWM signal with multimeter; replace controller if no signal. |
| Sudden drop in height after a few cycles | Overheating protection engaged | Allow motor to cool; ensure ventilation; consider higher‑capacity power supply. |
Conclusion
Testing a standing desk motor with a multimeter involves systematic safety checks, voltage verification, resistance measurement, and signal analysis. By following the seven steps outlined above, one can isolate the faulty component—whether it is the power adapter, motor winding, or control board—and make an informed decision about repair or replacement. The recommended HIENADTOR Charger Replacement, VIVO Desk Frame, and ErGear Desk Frame provide reliable tools and reference platforms for each stage of the diagnostic process.
Armed with this knowledge, the reader can confidently maintain a standing desk, ensuring a productive and ergonomically sound workspace.
Products Mentioned in This Guide
Frequently Asked Questions
What multimeter settings should I use to test a standing‑desk motor?
Set the meter to continuity or resistance mode for coil checks, and to DC voltage mode to measure supply voltage.
How can I tell if the motor’s wiring is broken?
A continuity test showing infinite resistance indicates an open circuit or broken wire.
What voltage should I expect from a typical standing‑desk motor power supply?
Most desk motors run on a 12 V DC supply, often around 2 A (24 W) output.
Do I need safety gear when troubleshooting a standing‑desk motor?
Yes, wear insulated gloves and safety goggles to protect against accidental short circuits or debris.
If the motor shows continuity but no movement, what component is likely faulty?
The controller or power adapter is probably defective, as the motor itself is electrically sound.