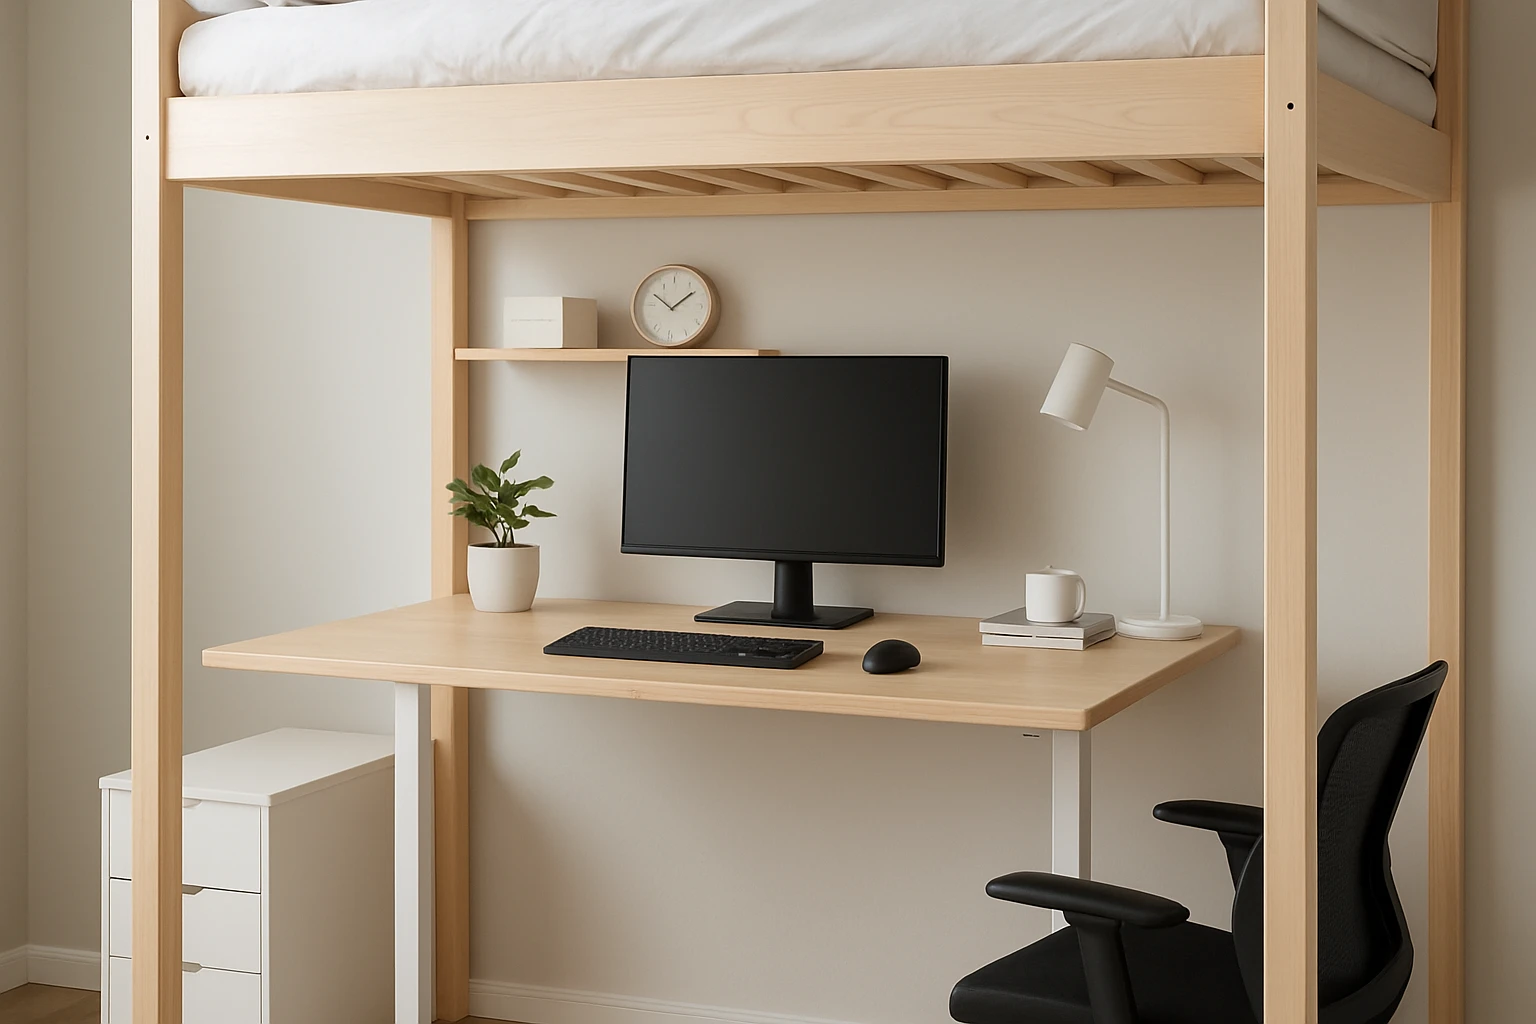
How to Create a Space‑Saving Standing Desk Under a Loft Bed in a Small Room (Step‑by‑Step)
In compact living environments, the combination of a loft bed and a standing desk can transform a cramped bedroom into a productive office. This guide will teach the reader how to measure, plan, and assemble a standing workstation beneath an existing loft bed while recommending reliable tools. By following each step, one can achieve ergonomic benefits without sacrificing floor space.
The reader will learn how to evaluate structural constraints, select appropriate height‑adjustable surfaces, secure the workstation safely, and finish the project with a polished appearance. The instructions are designed for individuals with basic DIY skills and access to standard household tools.
What You Will Need
- Measuring tape, level, and pencil for layout planning.
- Power drill with appropriate bits for metal and wood.
- Fasteners: screws, anchors, and washers suitable for steel frames.
- Optional: VIVO 32in Sit‑Stand Desk Converter for a ready‑made adjustable surface.
- Optional: Claiks Electric Adjustable Standing Desk for motorized height control.
- Optional: Bellemave Queen Loft Bed with Desk & Storage, Nuturelly Twin Loft Bed with Desk & Storage, or Garvee Twin Loft Bed with Desk & Storage if a new loft bed is required.
- Safety goggles and gloves.
Step 1: Assess Your Loft Bed Dimensions
The first task is to measure the clearance between the floor and the underside of the loft bed. Use a measuring tape to record the height at the front, middle, and back of the bed; this will reveal any slope caused by the frame. Record the width of the usable space, ensuring that the planned desk will not extend beyond the side rails.
If the existing loft bed is one of the models listed in the product section, note its specifications. The Bellemave Queen Loft Bed provides a 55.5‑inch under‑bed clearance, while the Nuturelly Twin Loft Bed offers a similar vertical gap suitable for most standing desk converters. Knowing these dimensions helps to select a converter that fits without modification.
It is essential to verify that the load‑bearing capacity of the loft frame can support the additional weight of a standing desk and any equipment placed on it. Most steel frames are rated for at least 500 lb, which exceeds the combined weight of a VIVO converter (approximately 33 lb) and typical office peripherals.
Document the measurements in a sketch; this visual aid will guide the placement of brackets and ensure a balanced layout.
Step 2: Choose an Adjustable Surface
For a seamless transition between sitting and standing, an adjustable surface is recommended. The VIVO 32in Sit‑Stand Desk Converter offers a 31.5‑inch wide work area, a sturdy steel construction, and a lift‑assist mechanism capable of supporting up to 33 lb. Its height range of 4.5‑20 in allows the user to align the top surface with eye level when standing.
Key features include a dual‑monitor surface, a keyboard tray that rises in sync, and a simple touch‑lock for height adjustment. The product is priced at $139.99 and holds a 4.6‑star rating from 12,805 reviews, indicating high customer satisfaction.
If motorized height changes are preferred, the Claiks Electric Adjustable Standing Desk provides three preset heights, a 48 × 24 in desktop, and a capacity of 176 lb. Priced at $149.99 with a 4.4‑star rating, it offers a more automated experience but requires a power outlet nearby.
Select the product that best matches the available clearance and personal workflow preferences. Both options are compatible with the under‑bed space of the loft models described earlier.
Step 3: Secure the Converter to the Loft Frame
Once the appropriate converter is chosen, it must be anchored securely to prevent wobble. Begin by positioning the converter on the floor beneath the loft bed, aligning it with the measured sketch. Use a level to verify that the base sits flat.
Mark the locations of the mounting brackets on the loft frame. Most loft beds feature pre‑drilled holes for side rails; if none exist, drill pilot holes using a drill bit slightly smaller than the screws. Insert metal anchors to reinforce the connection, especially when attaching to the steel frame of the Garvee Twin Loft Bed or the Nuturelly Twin Loft Bed.
Attach the converter using the supplied hardware or heavy‑duty L‑brackets. Tighten each screw firmly, but avoid over‑tightening, which could strip the metal. The VIVO converter includes a simple touch‑lock; however, additional brackets provide extra stability for frequent height changes.
After installation, test the lift mechanism several times to ensure smooth operation without binding. Adjust the bracket positions if any resistance is felt.
Step 4: Organize Power and Cable Management
A standing workstation typically requires power for monitors, a laptop, and possibly a lamp. Route cables through the loft bed’s side rails using cable clips or Velcro straps. If the loft bed includes built‑in storage shelves, consider installing a small power strip on the underside of the desk surface.
The VIVO converter’s keyboard tray raises in sync with the work surface, allowing cables to remain untangled during height adjustments. For the Claiks electric desk, place the control box on the desk’s rear edge to keep the cords out of the way of the lift mechanism.
Secure any excess cable length with zip ties to prevent them from dangling and causing accidental pulls. This practice also improves the aesthetic appearance of the workspace.
Finally, verify that the power source can handle the combined load of monitors and accessories; a standard 15‑amp household circuit is typically sufficient.
Step 5: Optimize Ergonomics and Comfort
With the converter installed, adjust the height so that the monitor top aligns with the user’s eye level when standing. The elbows should form a 90‑degree angle when typing, which the VIVO keyboard tray facilitates by raising concurrently with the main surface.
Place an anti‑fatigue mat on the floor beneath the standing area. This mat reduces strain on the legs and encourages longer standing periods. If the loft bed’s under‑bed clearance is limited, choose a thin mat that does not interfere with the desk’s range of motion.
Consider adding a small footrest for moments when the user prefers a semi‑standing posture. This accessory can be placed on the floor beside the desk without affecting the loft’s structural integrity.
Regularly alternate between sitting and standing every 30‑45 minutes to maximize the health benefits of a sit‑stand arrangement.
Step 6: Finish and Personalize the Workspace
After confirming stability and ergonomics, add personal touches such as a desk lamp, decorative plants, or a whiteboard mounted on the loft’s side panel. These elements enhance productivity without consuming additional floor space.
If the loft bed includes built‑in storage shelves, allocate items like notebooks, office supplies, or gaming accessories to keep the desktop clear. The Bellemave and Nuturelly models feature integrated shelves that are ideal for this purpose.
Inspect all fasteners once more after a week of use; repeated adjustments can loosen screws over time. Tighten any loose connections to maintain safety.
The completed setup provides a functional standing desk beneath a loft bed, delivering a space‑saving solution that supports both work and rest.
Tips & Pro Tips
- Before drilling, double‑check for hidden wiring or plumbing within the loft frame.
- Use a stud finder to locate the strongest points of the frame for mounting brackets.
- Apply a thin layer of silicone lubricant to the VIVO lift mechanism if it feels stiff after prolonged use.
- When using the Claiks electric desk, program the three preset heights to correspond with sitting, neutral, and full standing positions for quick transitions.
- Label cable bundles with colored tags to simplify future troubleshooting.
Troubleshooting
Problem: The converter wobbles when weight is applied.
Solution: Verify that all mounting screws are tightened against the loft frame’s side rails. Add additional L‑brackets if the original ones are insufficient.
Problem: The lift mechanism stalls at a certain height.
Solution: Check for obstruction in the guide rails and ensure the touch‑lock is fully disengaged before adjusting. Clean any debris that may have entered the mechanism.
Problem: Cables become tangled during height changes.
Solution: Route cables through the back of the desk and secure them with Velcro straps. Use a cable management sleeve to keep them organized.
Conclusion
By following the steps outlined in this guide, one can transform a small bedroom into a dual‑purpose environment that supports both restful sleep and productive standing work. The recommended products provide reliable, ergonomic solutions that integrate smoothly with existing loft bed structures. Implementing proper measurement, secure mounting, and thoughtful cable management ensures a safe and efficient workspace.
Readers are encouraged to adapt the instructions to their specific room dimensions and personal preferences, thereby creating a customized solution that maximizes space without compromising comfort.
Products Mentioned in This Guide
Frequently Asked Questions
What measurements do I need before building a standing desk under a loft bed?
Measure the clearance height, width between the bed supports, and depth from the wall to ensure the desk fits comfortably.
Can I use a pre‑made sit‑stand converter instead of building a custom surface?
Yes, a desk converter like the VIVO 32in model can be mounted to a sturdy tabletop for quick adjustability.
What tools are essential for assembling the desk?
A measuring tape, level, pencil, power drill with metal and wood bits, and appropriate screws, anchors, and washers.
How do I securely attach the desk to a steel loft‑bed frame?
Use metal‑grade screws and anchors, pre‑drill pilot holes, and add washers to distribute load and prevent movement.
Do I need any special safety precautions during installation?
Ensure the loft bed is stable, wear safety glasses, and double‑check that all fasteners are tightened before applying weight.