Introduction
In a compact 10×10 room, arranging two standing desks can appear daunting. This guide explains how to measure, plan, and execute a space‑saving layout while maintaining ergonomic standards. Readers will learn how to select appropriate desks, manage cables, and fine‑tune height settings for optimal comfort. The information is valuable for remote workers, students, or anyone seeking a productive dual‑desk arrangement without sacrificing room aesthetics.
What You’ll Need
- Measuring tape or laser measure
- Graph paper or digital floor‑plan app
- Two standing desks (recommended models are listed below)
- Cable management sleeves or clips
- Level and screwdriver set
- Anti‑fatigue mat (optional but recommended)
Step 1: Measure the Room Accurately
Begin by measuring the length, width, and ceiling height of the room. Record the dimensions on a floor‑plan sketch, noting windows, doors, and built‑in furniture. Use the measurements to calculate the usable floor area after subtracting the space required for circulation, typically at least 24 inches between furniture pieces. Accurate measurements prevent later re‑assembly and ensure that the chosen desks will fit without crowding the space.
Step 2: Draft a Layout Plan
With the floor plan in hand, experiment with different desk orientations. Two common configurations work well in a 10×10 room:
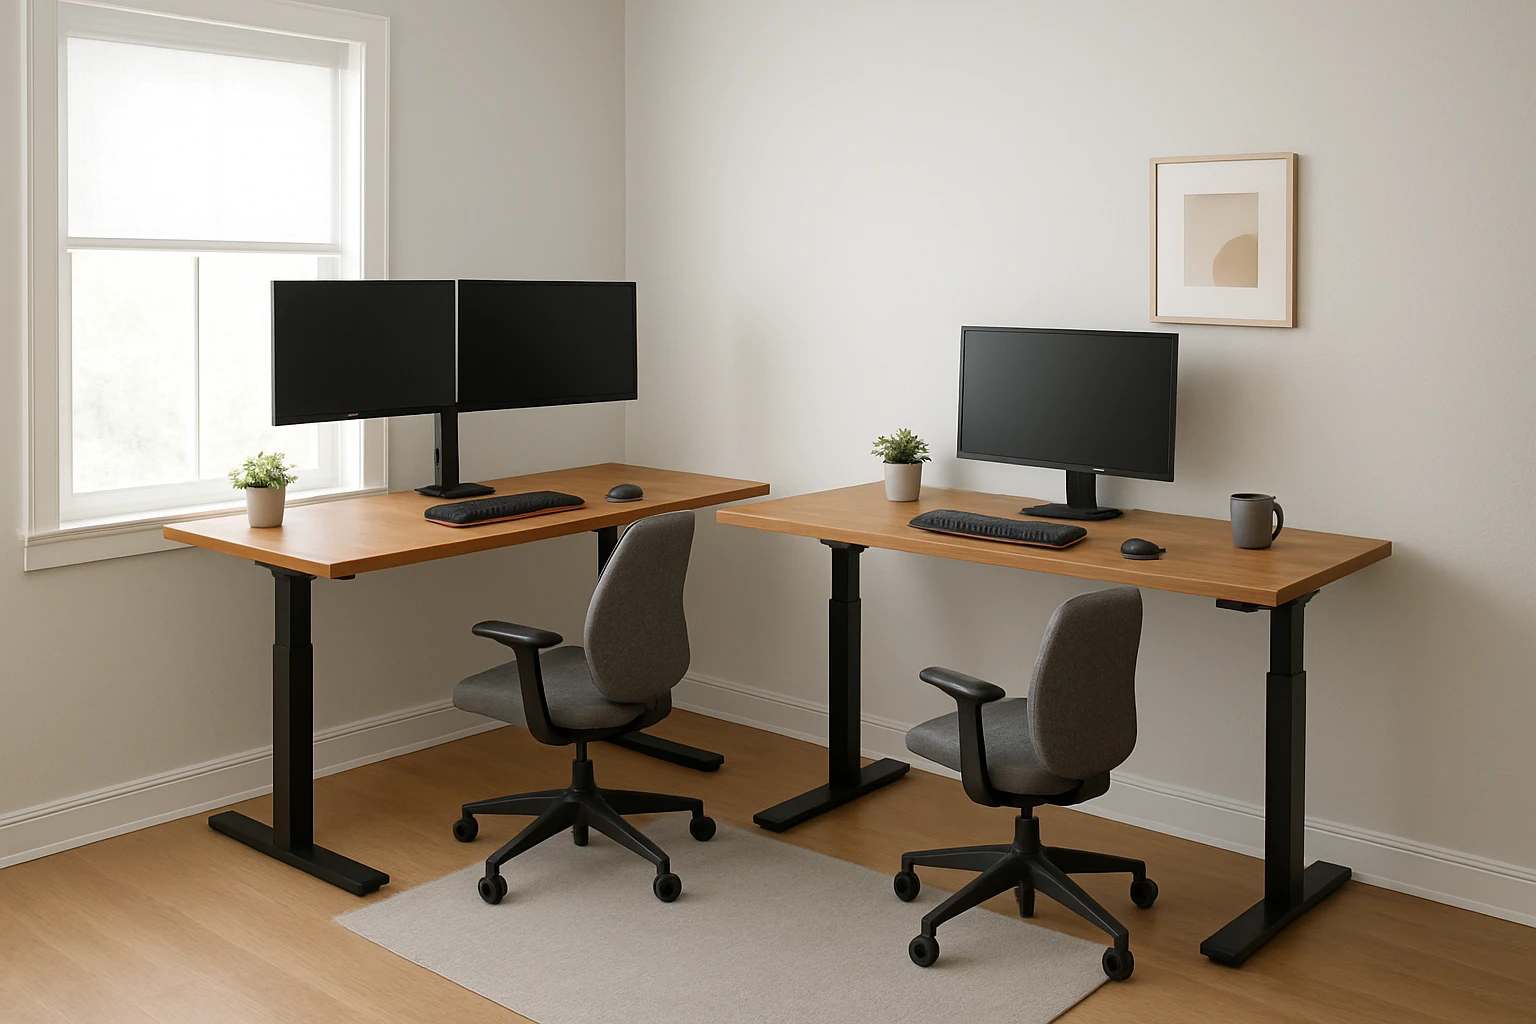
- L‑shaped arrangement: Place one desk against a wall and the second perpendicular to it, forming an L. This maximises corner usage and leaves a central walking path.
- Parallel arrangement: Align both desks parallel to the longer wall, leaving a central aisle of at least 30 inches for easy movement.
Choose the layout that best accommodates natural light, power outlets, and any existing storage. Mark the proposed desk footprints on the floor with painter’s tape to visualise the arrangement before assembly.
Step 3: Select the Appropriate Standing Desks
When selecting desks, consider stability, weight capacity, noise level, and price. The following three models provide a balance of durability and affordability, making them suitable for a small shared space.
- CubiCubi Electric Standing Desk – Priced at $99.99, this desk features a solid one‑piece desktop, aerospace‑grade steel frame, and four memory presets. It supports up to 176 lb and operates at less than 45 dB, ensuring a quiet environment. The single‑piece surface eliminates gaps that could catch cables, which is advantageous in a tight room.
- FEZIBO Adjustable Standing Desk – Priced at $104.99, this model offers three memory presets, a reinforced steel frame, and a FSC‑certified maple top. The desk includes pre‑assembled components that reduce setup time, a useful feature when two desks must be installed quickly.
- Claiks Electric Standing Desk – Priced at $105.55, this desk provides three preset height buttons, a sturdy steel frame, and a spacious 48×24 surface. Its easy‑assembly design and detailed video guide help users avoid errors that could waste valuable floor space.
All three desks have a height range of 28.3" to 46.5", allowing users to customize ergonomics for sitting or standing. Choose the model that best matches the aesthetic of the room and the required surface area for monitors and accessories.
Step 4: Assemble the Desks Efficiently
Follow the manufacturer’s instructions, but adhere to these universal best practices to minimise footprint during assembly:
- Lay out all components on a clean surface before beginning.
- Use the supplied level to verify that each leg is perfectly vertical; uneven legs can cause wobble and reduce usable space.
- Secure the frames first, then attach the desktop. This sequence prevents the desktop from obstructing access to the leg bolts.
- If the desk includes a headphone hook or cable tray (as on the CubiCubi model), install these accessories after the main structure is stable.
Both the CubiCubi and FEZIBO desks claim less than 45 dB motor noise, which is beneficial when two desks operate simultaneously. The Claiks desk includes an instructional video that can be streamed on a mobile device placed nearby, reducing the need for additional workspace.
Step 5: Manage Cables and Power Sources
In a 10×10 room, cluttered cables can quickly diminish the perception of space. Use cable sleeves or clips to bundle power cords, monitor cables, and peripheral wires. Route cables along the underside of the desk frames, securing them to the steel supports with zip ties. Position power strips near the wall outlet and hide them behind the desk legs to keep the floor clear.
Both the CubiCubi and FEZIBO desks feature built‑in cable management holes that allow cords to pass through the frame, preserving a tidy appearance. The Claiks desk provides drilled screw holes for optional cable trays, offering flexibility for users with multiple devices.
Step 6: Optimize Ergonomics for Dual Use
After the desks are positioned, adjust each to the user’s preferred height. The recommended ergonomic elbow angle is 90° when typing, with the monitor top at eye level. Use the memory presets on the CubiCubi (four presets) or FEZIBO (three presets) to switch quickly between sitting and standing positions throughout the day.
Place an anti‑fatigue mat in front of each desk if the floor is hard. This reduces joint stress during prolonged standing and adds a subtle visual boundary between the two workstations.
Finally, ensure that the walking path between the desks remains unobstructed. A clear 30‑inch aisle complies with most fire‑safety guidelines and promotes a comfortable flow of movement.
Tips & Pro Tips
- Use wall‑mounted monitor arms to free up desktop surface for paperwork or accessories.
- Install a low‑profile rug under the desks to define each workstation while protecting the floor.
- Label cable bundles with colored tags to simplify future re‑configuration.
- Test height presets after assembly; small adjustments may be needed to accommodate different chair heights.
- Consider a shared keyboard tray if both users need similar input devices, reducing duplicate equipment.
Troubleshooting
Desk wobbles at maximum height: Verify that all leg bolts are tightened and that the floor is level. Use shims under the legs if the floor is uneven.
Motor makes excessive noise: Ensure the desk is not overloaded beyond the 176 lb capacity. Check that the motor vent is not obstructed.
Cable tray does not fit: Use the cable management holes on the CubiCubi or FEZIBO models, which are designed for standard 1‑inch sleeves.
Conclusion
Fitting two standing desks into a 10×10 room is achievable with careful measurement, thoughtful layout planning, and the right selection of desks. By following the steps outlined above, readers can create a functional, ergonomic workspace that maximises every square foot. The recommended desks provide stability, quiet operation, and convenient memory presets, ensuring that both users enjoy a comfortable and productive environment.
Products Mentioned in This Guide
Frequently Asked Questions
What minimum clearance should I leave between two standing desks in a 10×10 room?
Leave at least 24 inches of walking space between desks to ensure comfortable movement and ergonomic positioning.
How can I accurately plan the layout before buying furniture?
Use a measuring tape or laser measure to record dimensions, then sketch a floor plan on graph paper or a digital app to test desk placements.
Which type of standing desk is best for a small 10×10 space?
Choose compact, height‑adjustable desks with a narrow footprint (around 30‑36 inches wide) and optional wall‑mount options to save floor area.
What cable‑management solutions work well in tight rooms?
Cable sleeves, clips, or under‑desk trays keep cords organized and prevent tripping hazards without taking up extra space.
Is an anti‑fatigue mat necessary for two standing desks?
While optional, an anti‑fatigue mat reduces leg strain during long standing periods and adds a subtle visual boundary between work zones.