How to Convert a Standing Desk into a Drafting Table in a Small Studio: A Step‑by‑Step Space‑Saving DIY Guide
Introduction
One often discovers that a small studio requires a versatile work surface that can support both computer work and detailed drafting. This guide explains how to repurpose a standing desk into a drafting table, preserving valuable floor space while enhancing ergonomic comfort. The reader will learn to assess the workspace, select appropriate accessories, and assemble a functional drafting surface without extensive construction. By the end of the guide, one will possess a customized workstation that supports long‑hour design sessions and promotes better posture.
Although the instructions are tailored for a compact studio, the principles apply to any environment where space efficiency is paramount. The approach combines inexpensive, readily available products with simple modifications, ensuring that the solution remains affordable and reproducible. Professional results are achievable without specialized carpentry skills, making the project accessible to intermediate DIY enthusiasts.
What You’ll Need
The following items provide the core functionality for the conversion. Each product is linked to its Amazon page for convenient purchase, although the guide also describes alternative options.
- Huuger Electric Standing Desk – $159.99, 4.4/5 rating, 55" x 27.6" desktop, height range 28.3"‑46.5".
- Vecelo Vintage Tilting Art Desk – $89.99, 3.9/5 rating, adjustable tilt 0°‑45°, built‑in pencil ledge.
- Owfeel Right Angle Clamp Set – $15.99, 4.1/5 rating, stainless steel, open and close designs.
- Measuring tape, screwdriver set, non‑slip rubber pads, and optional cable management clips.
Step 1: Assess Your Studio Layout
Begin by measuring the floor area surrounding the existing standing desk. Record the width, depth, and clearance required for chair movement and leg space when the desk is lowered to drafting height. Ensure that the desk can be positioned against a wall or in the centre of the room without obstructing doorways or windows. This measurement phase prevents later conflicts and informs the selection of a drafting surface that fits within the available footprint.
Next, evaluate the lighting conditions. Drafting work benefits from bright, diffuse illumination, so consider placing the desk near a source of natural light or planning for an adjustable desk lamp. Good lighting reduces eye strain and improves the accuracy of line work. Document these observations in a simple sketch to guide the subsequent placement of components.
Step 2: Prepare the Huuger Electric Standing Desk
Unpack the Huuger Electric Standing Desk and follow the manufacturer’s assembly instructions. Verify that the motor operates quietly, as the desk advertises less than 45 dB noise, which is essential for a focused studio environment. Use the intelligent keypad to set three height presets: a seated position for computer work, a standing position for general tasks, and a low‑profile drafting height around 28.3" to 32".
The desk’s sturdy steel frame supports up to 220 lbs, providing a reliable base for additional accessories. Attach the provided cable managers to keep power cords organized and prevent interference with the drafting surface. The two side hooks can hold headphones or a bag, freeing desk space for drawing tools. By configuring these features early, one ensures a clean and functional platform for the upcoming modifications.
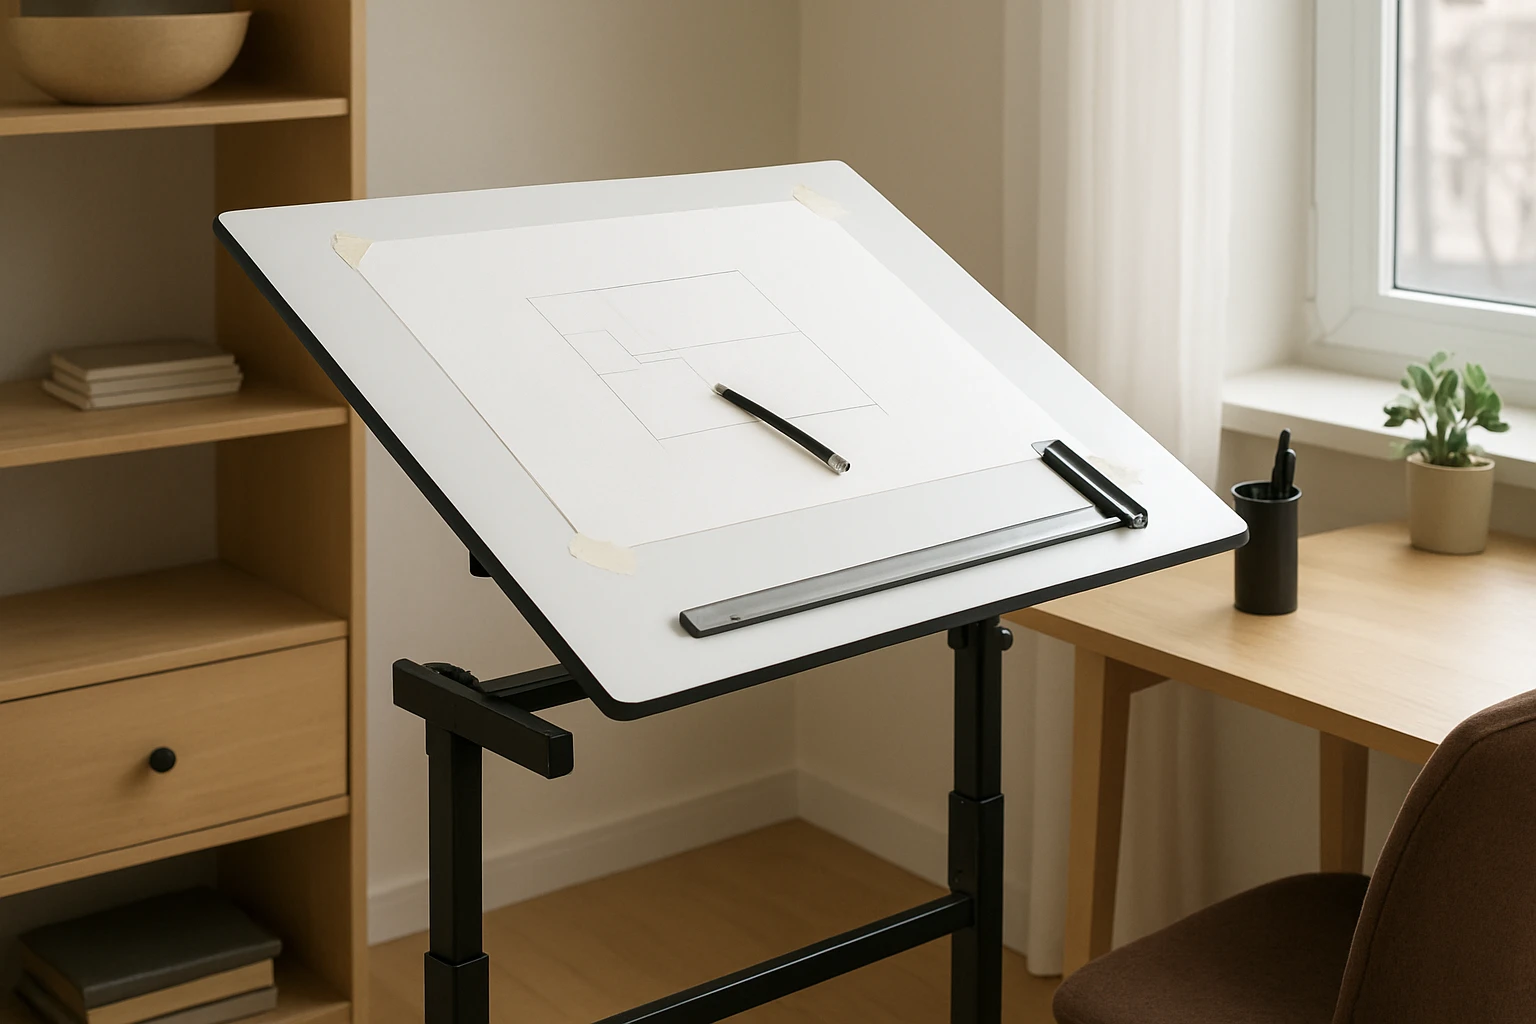
Step 3: Attach the Vecelo Vintage Tilting Art Desk as a Drafting Surface
The Vecelo Vintage Tilting Art Desk serves as an ergonomic drafting top that can be mounted onto the standing desk frame. Its adjustable tilt from 0° to 45° allows the user to set an optimal angle for drawing, sketching, or painting. Position the art desk on the standing desk, aligning the MDF tabletop with the edges of the Huuger desktop to create a seamless work surface.
Secure the art desk using the built‑in lockable slide wheels and the provided side trays as stabilizers. If the wheels interfere with the standing desk’s movement, replace them with non‑slip rubber pads to maintain stability while preserving mobility. The pencil ledge on the art desk offers a convenient location for paper rests, and the removable side tray provides storage for pens, rulers, and small tools, reducing clutter on the main surface.
Step 4: Install an Adjustable Angle Mechanism
While the Vecelo desk already includes a tilt function, an additional angle adjustment can be achieved by using the right‑angle clamp set as a pivot. Place one clamp on the underside of the Huuger frame and the other on the back edge of the Vecelo tabletop. Tighten the clamps to create a hinge that allows fine‑tuned angular changes beyond the built‑in range.
The Owfeel Right Angle Clamp Set is fabricated from thick stainless steel, ensuring durability and resistance to deformation under repeated adjustments. Its open‑type design enables quick release for rapid angle changes, while the close‑type variant provides a more rigid lock when a fixed position is required. By employing these clamps, one gains precise control over drafting ergonomics without permanent modifications.
Step 5: Organize Tools and Secure Workpieces
Effective drafting demands that tools remain within easy reach yet do not obstruct the drawing surface. Use the removable side tray of the Vecelo desk to store frequently used items such as pencils, erasers, and a ruler. For larger items like drafting boards or reference prints, employ the Owfeel clamps to hold them at the desired angle on the tabletop.
The clamps’ anti‑collision feature automatically reverses direction if an obstacle is encountered, protecting delicate artwork from accidental damage. Position the clamps at the corners of a sheet of paper to create a taut, flat drawing area, mimicking a traditional drafting table. This setup eliminates the need for separate easels and maximizes the usable workspace on the combined desk.
Step 6: Test Ergonomics and Fine‑Tune Settings
With the assembly complete, sit and stand at the workstation to evaluate comfort. Adjust the Huuger height presets so that the elbows rest at a 90° angle when drawing, and the monitor (if used) sits at eye level to reduce neck strain. Verify that the tilt angle of the Vecelo surface aligns with the natural wrist position, preventing fatigue during extended sessions.
If any wobble is detected, add additional non‑slip pads beneath the legs of the standing desk or tighten the clamp bolts further. Ensure that cable managers do not interfere with the movement of the desk or the clamps. A final walkthrough of the space confirms that the conversion meets both functional and aesthetic goals.
Tips & Pro Tips
Consider applying a thin, anti‑glare mat to the drafting surface to reduce reflections from studio lighting. This simple addition improves line visibility and protects the MDF tabletop from ink stains. For artists who require a larger drawing area, attach a second Vecelo tabletop using additional Owfeel clamps, creating a seamless extended surface.
When working with heavy drafting equipment, verify that the combined weight does not exceed the Huuger frame’s 220‑lb capacity. Distribute weight evenly across the desk to maintain stability. Periodically lubricate the standing desk motor according to the manufacturer’s guidelines to preserve the whisper‑quiet operation praised by users.
Troubleshooting
Problem: The standing desk does not reach the desired low height for drafting. Solution: Re‑calibrate the intelligent keypad presets, ensuring the minimum height is set to the lowest possible value (28.3"). If the motor stalls, check for obstructions under the desk and verify that the anti‑collision sensor is not falsely triggered.
Problem: The drafting surface wobbles when applying pressure. Solution: Add additional clamps from the Owfeel set at the front corners, and place non‑slip rubber pads under the legs of the Huuger desk. Tighten all bolts to the recommended torque, typically 5‑7 Nm for steel clamps.
Conclusion
This guide has demonstrated how to transform a compact standing desk into a fully functional drafting table using a few carefully selected tools. By leveraging the height flexibility of the Huuger Electric Standing Desk, the adjustable surface of the Vecelo Vintage Tilting Art Desk, and the precision of the Owfeel Right Angle Clamp Set, one can achieve a space‑saving, ergonomic workstation without extensive construction.
Readers are encouraged to apply the outlined steps, adapt the recommendations to their specific studio dimensions, and enjoy the increased productivity that a well‑designed drafting station provides. The combination of thoughtful product selection and careful assembly results in a durable, versatile workspace that supports both digital and analog creation.
Products Mentioned in This Guide
Frequently Asked Questions
What basic tools and materials are needed to turn a standing desk into a drafting table?
You’ll need a sturdy tabletop extension, adjustable brackets, a drill, screws, and optionally a locking hinge for tilt control.
Can the conversion be done without permanent modifications to the standing desk?
Yes, using clamp‑on brackets or removable brackets lets you attach the drafting surface without drilling into the desk.
How does a drafting table improve ergonomics in a small studio?
It allows the work surface to tilt to a comfortable angle, reducing neck strain and promoting better posture during long design sessions.
Is the DIY conversion cost‑effective compared to buying a pre‑made drafting table?
Typically the DIY approach costs 50‑70% less, using inexpensive accessories and repurposed desk components.
Will the converted drafting table remain stable when fully extended?
When you use robust brackets and secure the extension with locking pins, the setup stays stable even at maximum height and tilt.